Archive for the ‘Restoration’ Category

1959 Buick Tire Size and Wheel Colors

Monday, February 15th, 2010

Baby waitin’ for a new set of shoes…

The original correct tire size for the Electra 225 was Bias Ply 800 x 15 with white walls optional.  Unfortunately, that exact size is not currently available.  I had to make a decision to either go with radials or original bias ply.  After much deliberation…and even canceling an order of radials moments before they were shipped…I decided to go with Coker’s (http://store.cokertire.com/) U.S. Royal branded 820-15 bias ply with 2 3/4″ whitewall. I could have gone with the Coker brand with 2 1/2″ whitewalls, but there was no such thing as “Coker” brand tires in 59.

By most accounts, correct whitewall width should be between 2.3″ and 2.5″ (the factory installed different brands with each brand having slightly different white wall widths). Luckily…after installation the whitewall measures exactly 2.5″ because 1/4″ is inside the rim.. I’m hoping that with the entire front end being rebuilt it will be nice and tight so I won’t be all over the road with these bias ply tires. Just in case… Greg is painting me a second set of wheels if I want to throw on some radials at a later date.

One of the regular Buick Options for many years through 1958 was having the wheels painted red from the factory.  For 1959 Buick decided to make the standard wheel color black, with the only option of changing the wheel color to body color.  In the case of a white car it meant going with either standard black wheels or optional white wheels.  As purchased, this car had optional white wheels which quite honestly look like poop.  The temporary black rims that were on the car  in the shop were not much of an improvement.  Below is a picture of white 59 Buick where the rims were painted red to match the interior (note that this car has the Deluxe wheel covers, whereas the Electra 225 came with the Super Deluxe wheel covers with spinners) …

In the case of a white car with red interior, I think the factory missed the boat and should have offered red wheels.  I’ve decided to deviate from stock on this issue and have the wheels painted red! (heck…I like these red wheels so much maybe I’ll just chuck the wheel covers)

Out of the shop for the first time…

___________________
~ Tom Sidoti
1959 Buick Electra 225 Convertible
1959 Buick Radio Options

Sunday, February 14th, 2010

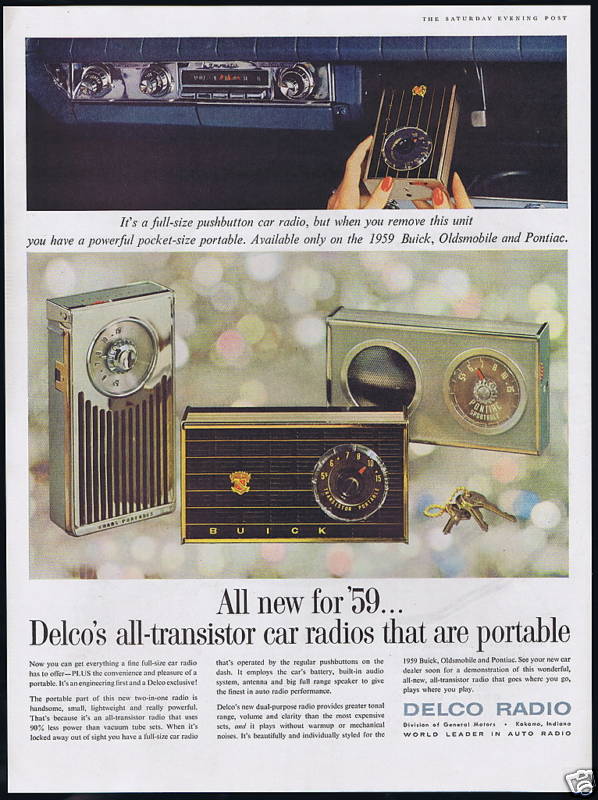
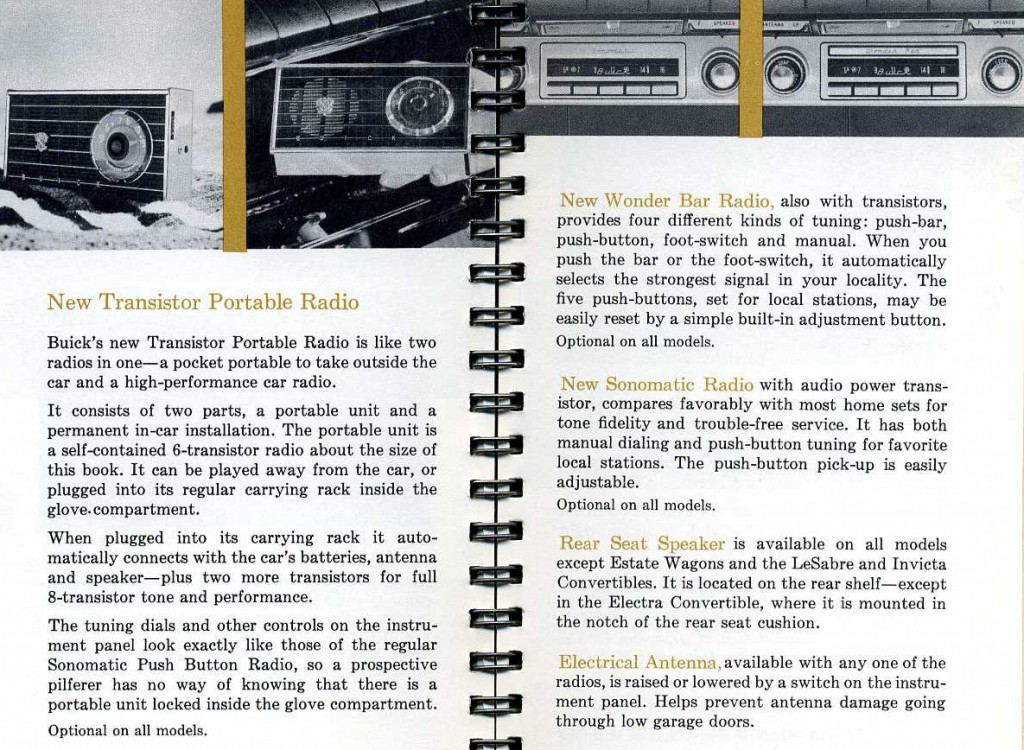
Radios were optional on all models of the 1959 Buick with three options available.  Buyers had a choice of Sonomatic Push Button radio, Wonder Bar radio with foot switch, and the Transistor Portable radio.  All 3 radios featured manual and push button tuning.  Other options include rear speaker and power antenna.

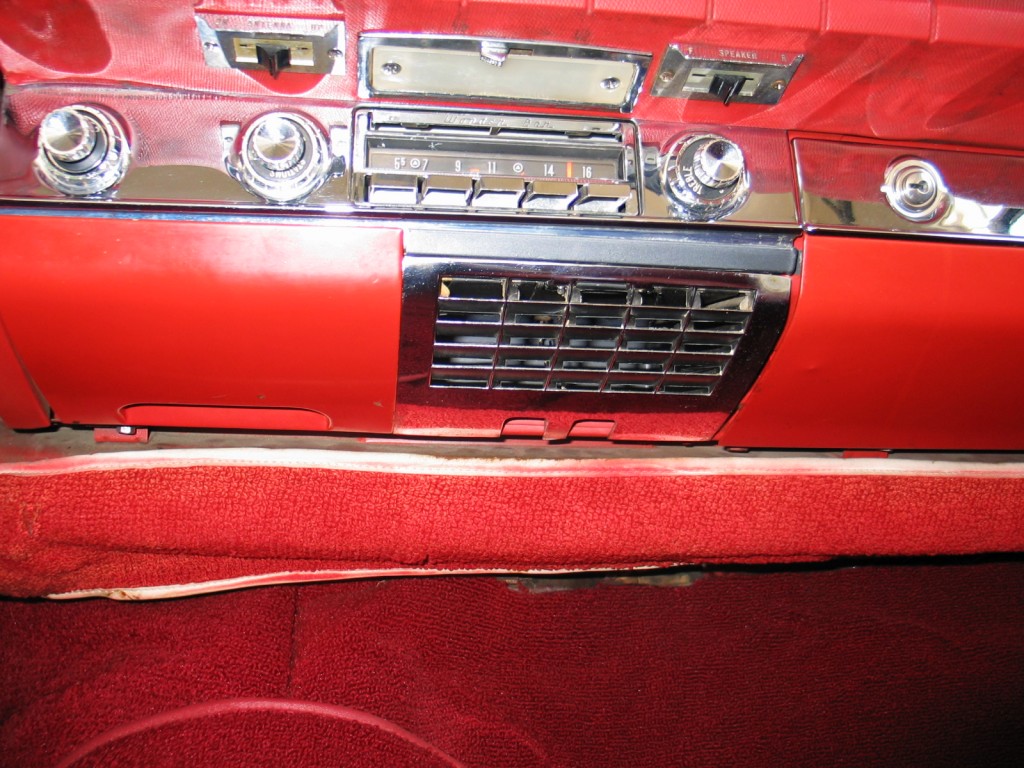
As can be seen from the photo, this car was ordered with the Wonder Bar Radio, Power Antenna and Rear Speaker.  The below photo (taken before the restoration) shows the radio and switches for the power antenna (left of the courtesy light) and rear speaker (right of the courtesy light).  A close look will reveal the “Wonder Bar” located just above the radio dial.  Pressing the wonderbar engaged a signal seeking circuit which activated a small electric motor that moved the pointer to the next AM signal detected.  The radio also featured a sensitivity dial beneath the volume knob that allowed the user to vary the strength of the signal needed to stop at any particular station.  The Wonder Bar radio also included a special foot switch located on the toe board to the left of the brake pedal.  Depressing this switch allowed the user to engage the signal seeking circuit to change radio stations (Click on Picture to Enlarge).

Below are descriptions of the different radio options from the 1959 Buick Facts Book (Click on Picture to Enlarge).

It was not possible to order both the Wonder Bar and the Transistor Portable together.  Whereas the Wonder Bar radio used vacuum tube electronics located directly in the dash mounted radio, the transistor electronics for both the dash mounted radio and the portable radio were housed in the Transistor Portable radio located in the glove box.  Although the dash mounted radio for the Transistor Portable option looked identical to the Sonomatic, and it played through the car speakers, in reality the dash unit was a dummy with it’s volume and station controls remotely controlling the electronics from the portable.  This means that the dash radio could not operate without the portable being plugged into its correct location in the glove box.  While the Sonomatic and the Wonder Bar radios would take a few seconds for the tubes to warm up before playing,  both the dash mounted unit and the portable unit for the Transistor Portable option would begin playing instantly because there were no tubes, just the transistors in the portable unit.

Below is a 1959 advertisement for the Transistor Portable radios that were installed in Buick, Oldsmobile and Pontiac vehicles in 1959 (Click on Picture to Enlarge).

Interior Leather, Door Panels and Dash

Saturday, February 13th, 2010

Lots of progress on the interior!

The upholsterer has transformed those skins into some authentic red leather seats.

The dash started coming back together and Greg reinstalled the steering column.  The Wonder Bar radio was completely restored by Retro Radio (http://www.retroradio.biz/index.html), an input feed for an MP3 player was added to the back of the radio and a small input cable will be routed to the glove box .


Check out the side Air Conditioning vent…pretty cool stuff for 1959

Believe it or not this glove box is wired for an iPod

Rear Quarter Panels from SMS being installed by upholsterer…


What an awesome dash layout, looks great against the new  loop pile carpeting…

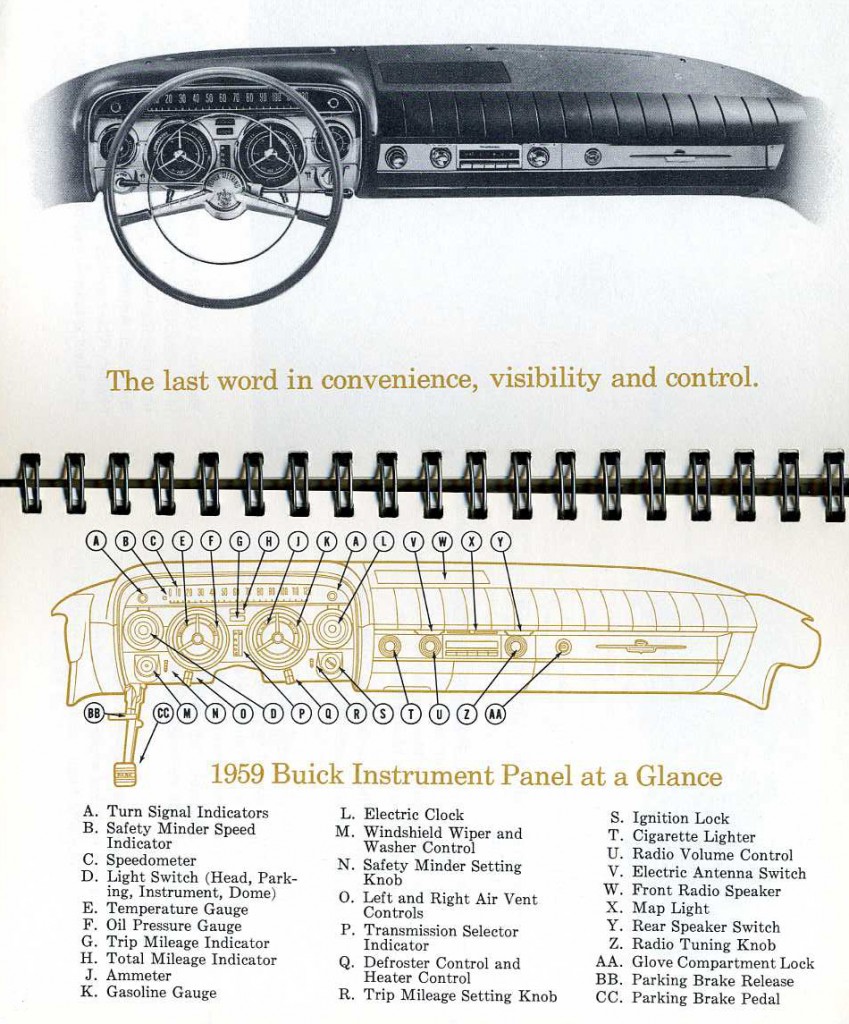
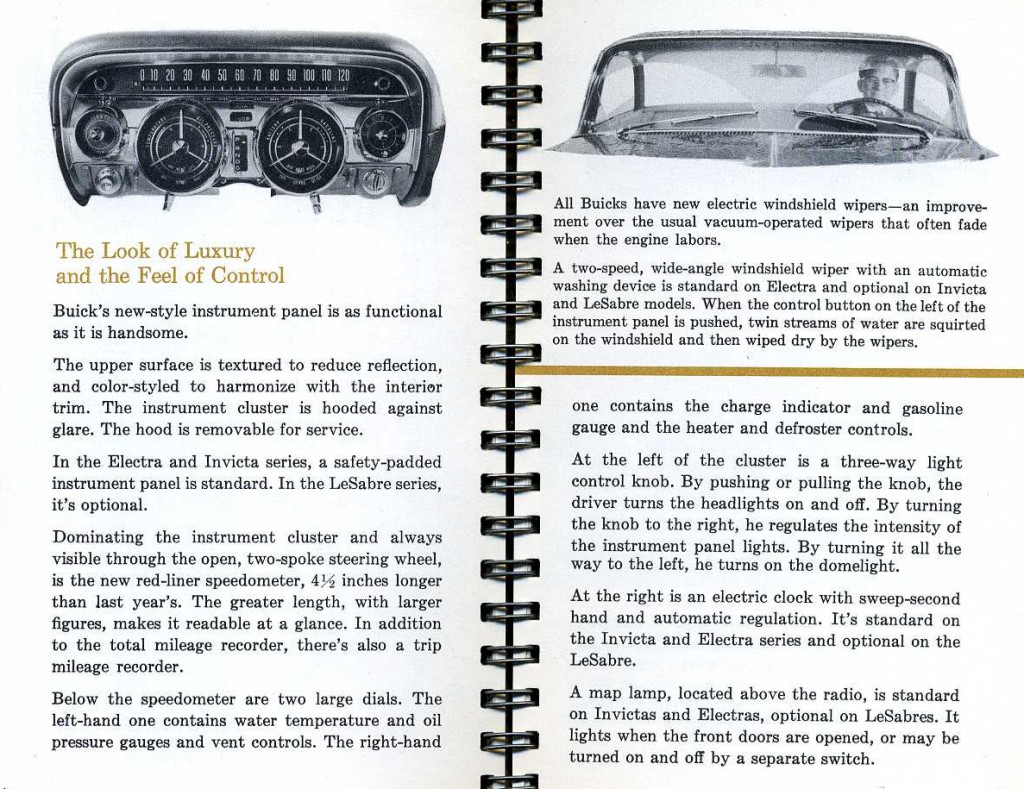
Below is an explanation of the of the 1959 Buick Instrument Panel layout from the from the actual 1959 Buick Facts Book (Click on next two Pictures to Enlarge).

A/C Duct under the dash painted correct flat red…

Front door panels and trim…switches on the arm rest are for the main windows, the ones on the door panel are for the optional power vent windows.

Door Panel Handle Cups Painted…

Weatherstripping installed…

Because of the fine detail on the convertible ashtray lids they are one of the hardest items to get right when it comes to finishing…wasn’t easy, but Greg’s handiwork comes through again…

For comparison, here are a couple shots of the old incorrect interior…

…and here is where we are now…I’d say its a bit of an improvement!

Seems s a guy could get comfortable in a big leather back seat like this… Very Happy


Here’s a shot of Greg Cook, the ol’ master himself… remember, this car came to him in “kit form”…as in boxes…and without an instruction manual!

_________________
~ Tom Sidoti
1959 Buick Electra 225 Convertible
1959 Buick Convertible Top

Saturday, February 13th, 2010

I needed to decide what color convertible top to install…

The convertible top color options for a white with red interior car were either black or white (red was not available).  There are a lot of pros and cons for each choice.  Some believe black is too hot, others believe white will yellow quickly, etc. etc.  Here are a couple pictures showing it both ways…Black top on a LeSabre and White top on an Electra 225

After thinking about it and changing my mind a million times I’ve decided to go with a white top…it won’t bake inside when parked in the sun with the top up, and I think it will look a little classier.

Convertible Top is installed…

Interior continues to move along…

_________________
~ Tom Sidoti
1959 Buick Electra 225 Convertible