Archive for the ‘Restoration’ Category

1959 Buick Instrument Panel Restoration

Sunday, January 24th, 2010

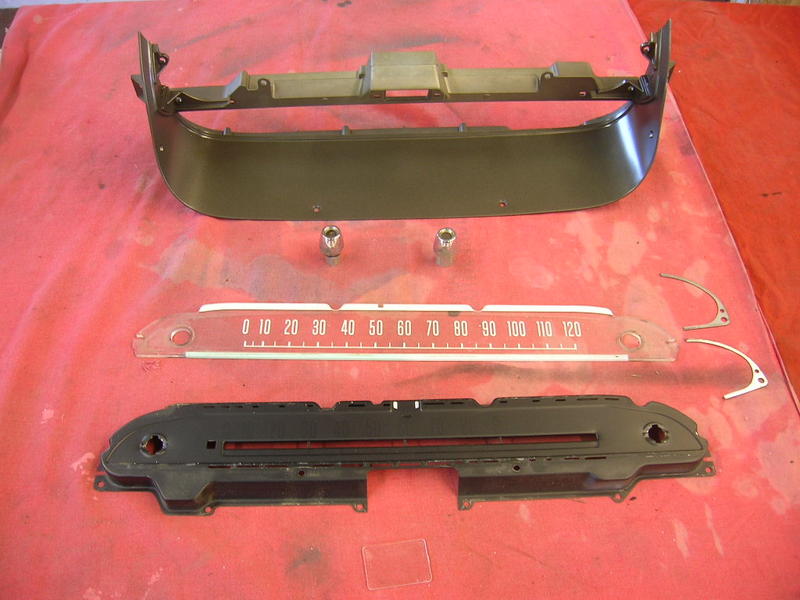
Work is starting on the instrument cluster, looks like a tangled mess just lying there. The little silver box with the six holes in it on the left side of the metal support is one of the air sensors for the automatic heat.

First to clean up the speedometer lens and housing…


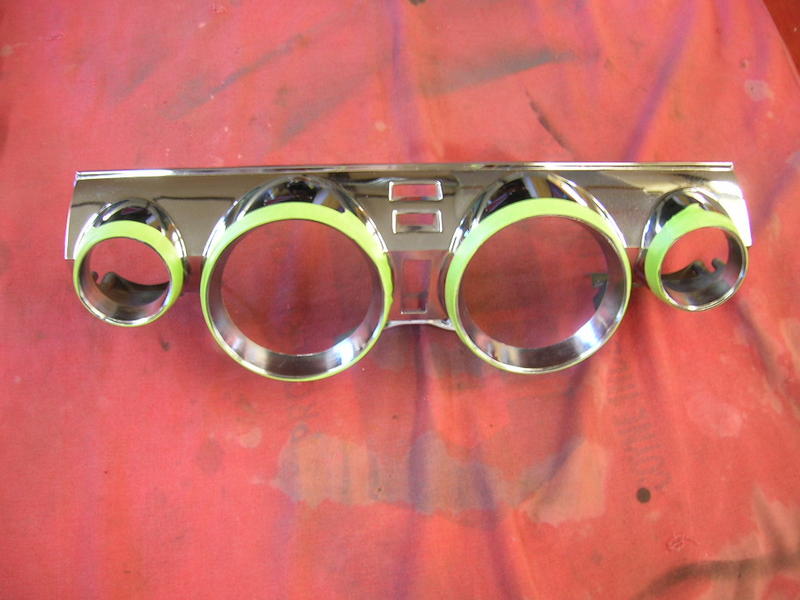
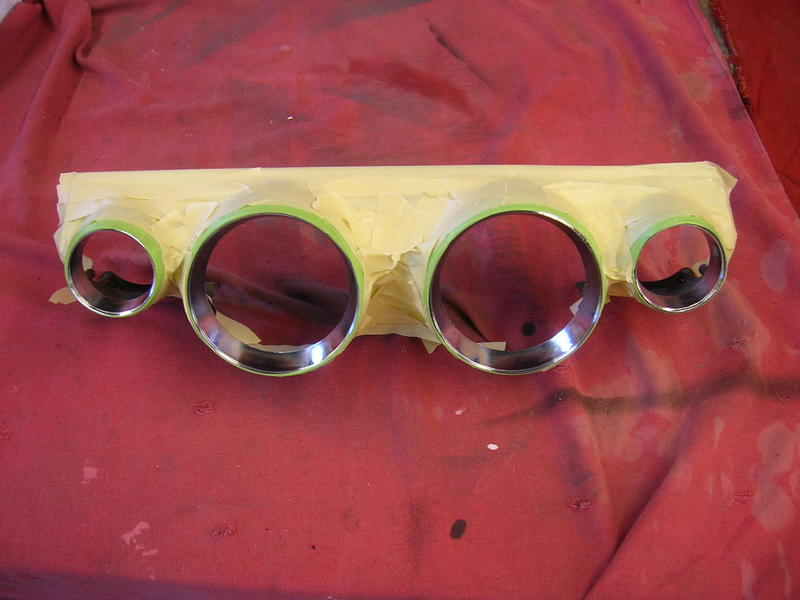
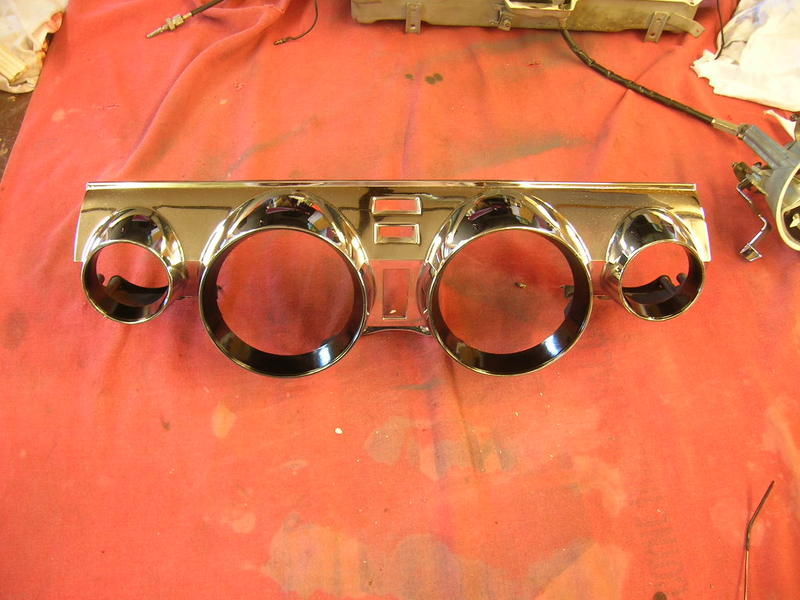
A common problem with the 59 dash cluster is that the black paint on the inside of the gauge bezels cracks and flakes off off over the years.  Some people scrape off the paint and leave just the chrome plating which isn’t correct and doesn’t look quite right.  In these pictures the dash is being prepared for some fresh black paint for the inside of the gauge bezels….
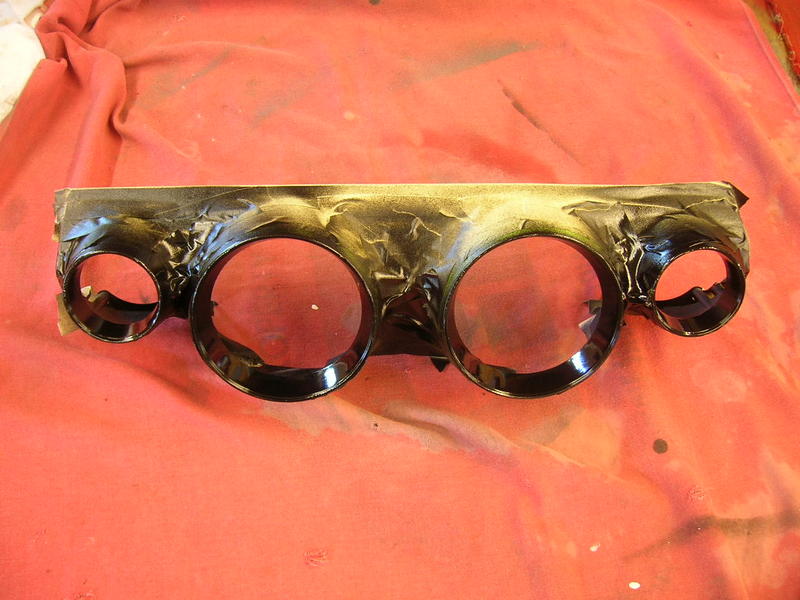
…………………voila’…

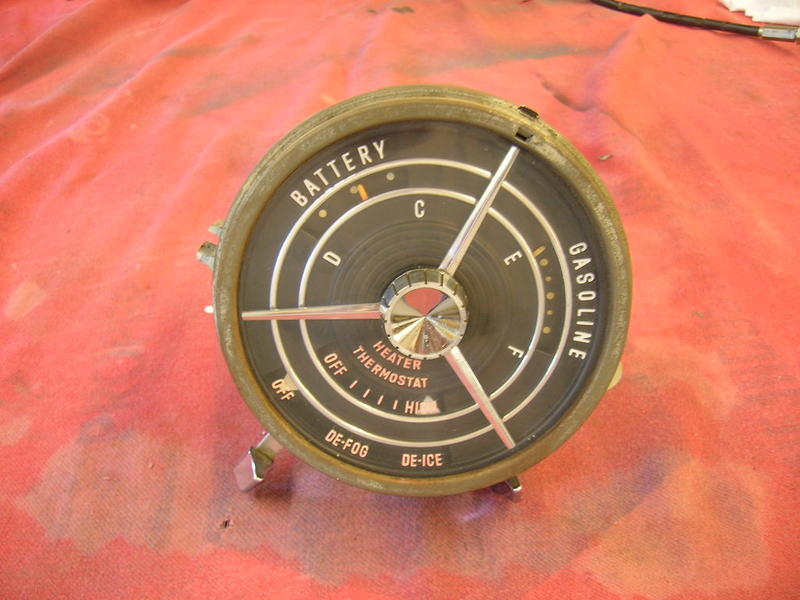
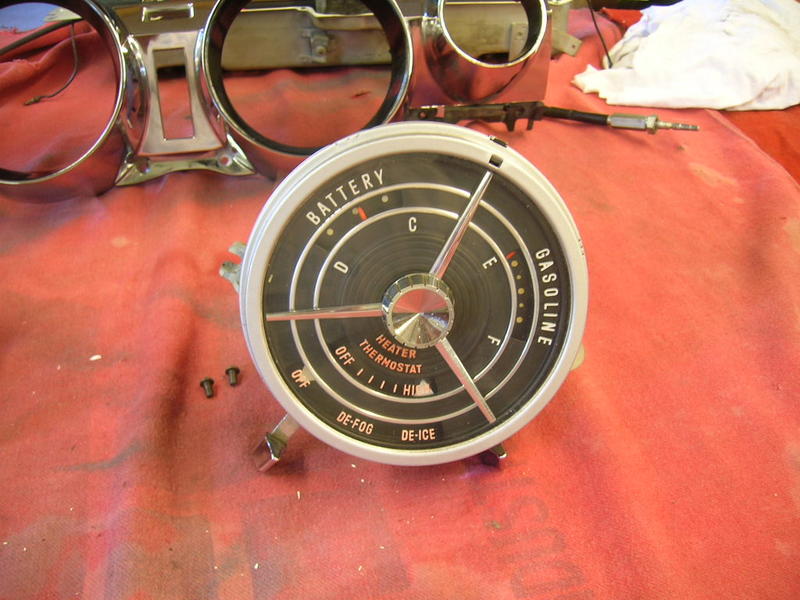
Moving right along to clean 50 years of dust and dirt from the gauges.  Notice that we have the replacement temperature gauge.

Here’s an interesting tidbit. All the gauge pointers on a 59 Buick are reddish orange right?  Well, not exactly…  all the pointers are reddish orange except for the cars with the optional automatic heat. I had thought the pointers on my automatic heat gauge had faded white from the sun and needed to be repainted, but when Greg took it apart he thought something looked fishy. He went out to the parts car (which also has automatic heat) and sure enough those pointer were white also. So for all you Concours judges out there…whereas all the gauges should have white lettering on the lens with reddish orange pointers beneath, the automatic heat gauge should have reddish oange lettering on the lens with white pointers beneath. You learn something new every day.


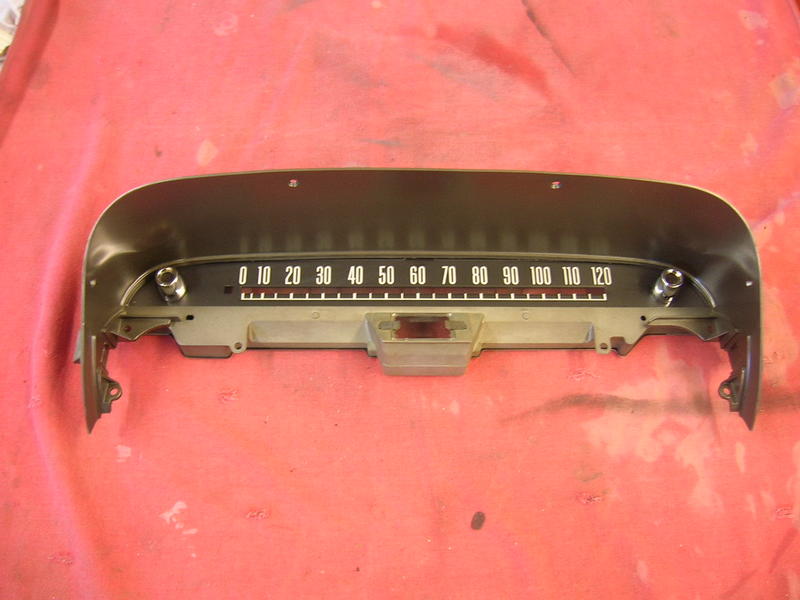
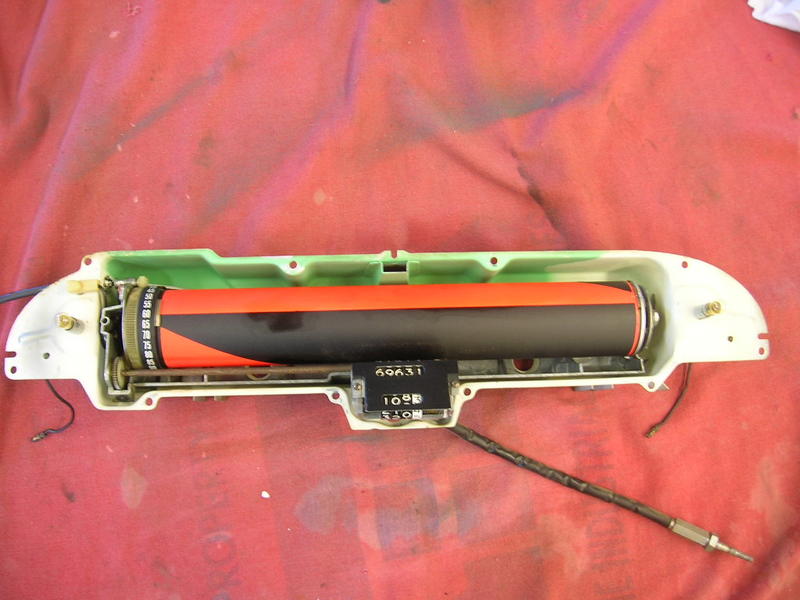
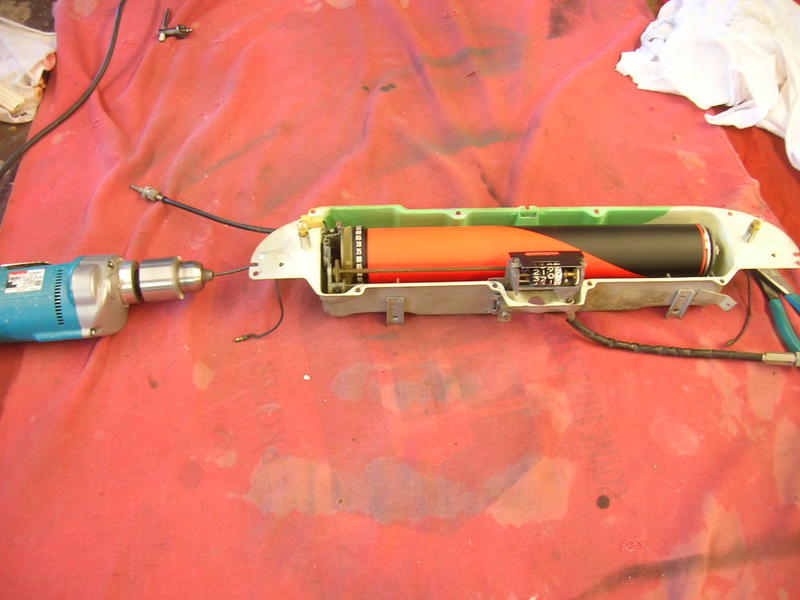
Now to clean and lube the speedometer.  For those that have never seen one, a cool feature of the 59 Buick is the speedometer.  Speed is indicated by what appears to be a red line that moves across the dash as speed increases.  The below pics reveal the secret as to how this is accomplished.  A black and red drum behind the dash slowly spins as speed is increased giving the illusion of the red line line.


And finally………..drum roll please……….Looks Positively Dashing…


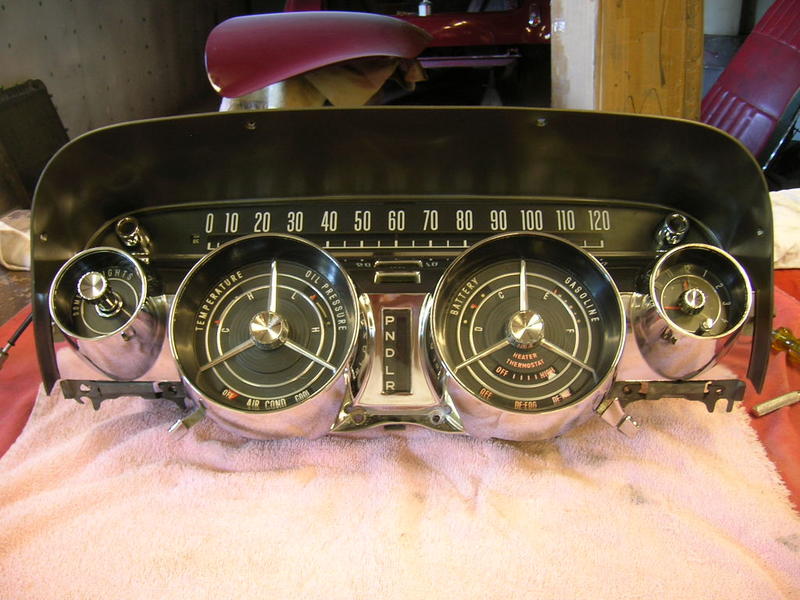
Amazing what a little spit shine can do for a tired old dash!

And now to heave this thing back into the car…

_________________
~ Tom Sidoti
1959 Buick Electra 225 Convertible

1959 Buick Carburetor

Saturday, January 23rd, 2010

Bit of  Set-Back…

During the test firings of my car we were using an extra carburetor that Joe had that he will be using on another project.  We weren’t using mine because we were waiting on a rebuild kit.  Rather than me try to explain the carb issues Greg found, I’ll just use his own words…

“The carb kit arrived today. I started cleaning the main body of the carb. There was a bunch of carbon on the bottom side. By the time I got all that old black carbon dug out this is what was left! Good golly! As you can see it’s just a bit thin around the one bore indicated by screwdriver point. I’m pretty sure that it’s not supposed to be black around the rear bores.

I pulled Joe’s AFB off your engine for comparison.  Also, I noticed when I had it running the other day that the choke stat was not pulling heat. I figured the passage was just gunked up. Turns out that the expansion plug under the choke piston is gone!

Below are some comparison shots of my carb (left) versus the temporary one we were using. As we can see, Joe’s carb is just about perfect, and mine’s a mess! The sidewall is eroded out of the one primary bore. The soft plug for the vacuum advance passage is pinholed. Plus just the general erosion in the heat passage.

Greg tells me however that all this is not the end of the world! The stainless steel plate goes right up against the bottom of the carb base. Shouldn’t be a major problem to fill it and smooth it out but the the primary bore sidewall will be a bit tricky.

In the below pic you can see that Greg made some “forms” using aluminum tape on the carburetor. Smeared some steel epoxy on it and let it cure. He’ll then knock it down using the same technique he would use to straighten a quarter panel, back and forth with the long board. When it gets close he’ll switch over the “figure 8” method. Then he’ll attach sticky one side sandpaper to a piece of glass and do “figure 8s” on it with the carb base until it’s nice and flat!

A shot of the base after the steel epoxy was sanded down…the small cavity that was filled in has no effect on carb performance

Now for some black paint to be used as a “guide coat” to make sure it is sanded down perfectly flat,,,

…and here’s the finished carb base ready for installation…not too shabby for something that looked like it was ready for the trash heap…

Since refurbishing the carb base was a success…it’s safe to move forward with the disassembly and rebuild…here’s the “exploded” view…

_______________
~ Tom Sidoti
1959 Buick Electra 225 Convertible

First Engine Start-Up

Friday, January 22nd, 2010

It’s official…a heart beats inside of Snow White!

Rather than wait until after the front clip was installed, Greg Cook thought it best to fire it up to make sure all was well with the engine while it would still be easy to make any corrections.  He rigged some temporary supports for the radiator and a fan for a trial start…it doesn’t look pretty, but does the job

The Good:
The engine runs and sounds just fine. On initial fireup there was a lot of smoke but that’s not at all unusual. Not billowing, but unpleasant in-the-shop smoke. Some was from the treated exhaust manifolds, some was from the new exhaust system, and some was from rings not quite seated yet.  After letting it cool for 30 minutes it was restarted, smoke was MUCH better. Super throttle response. Punch it and 4 barrel works great. Oil pressure idles down to 20/25 psi hot. Crack the throttle and it zips to 50 and blows off. Just right.

The engine gets good marks.

The Bad:
The new water pump has a hairline crack, therefore it leaks. Not good, need another one.
The dash temperature gauge doesn’t work, it’s a mechanical gauge with a thermal bulb that screws into the left head, it never moved off Cold, need another one.

The Ugly:
That Rube-Goldberg contraption Greg set up for the test firing…but it worked!

All in all, a not so bad day.


_________________
~ Tom Sidoti
1959 Buick Electra 225 Convertible

1959 Buick Power Brakes

Thursday, January 21st, 2010

All 1959 Buicks with power brakes used a one-year only Delco-Moraine single reservoir system with the master cylinder mounted below the toe board.  NOS or rebuilt cylinders or parts are virtually nonexistent making rebuilding the existing cylinder the only option.  The power brake master cylinder and booster was rebuilt by Power Brake X-Change (http://www.powerbrakex-change.com/), all new pre-bent stainless steel brake lines as well as rubber brake lines came from Classic Tube (http://www.classictube.com/) and fit perfectly.  New wheel cylinders, brake linings, and springs came CARS (http://www.oldbuickparts.com/).

Below is explanation of the 1959 Buick Power Brakes, standard on the Electra 225,  from the 1959 Buick Facts Book (Click on Picture to Enlarge).

____________
~ Tom Sidoti
1959 Buick Electra 225 Convertible