Cruising right along…
After stripping all of the dash parts…

Greg managed a spot-on match with the paint color…


New door panels and pump covers have also just arrived from SMS.


_________________
~ Tom Sidoti
1959 Buick Electra 225 Convertible
Cruising right along…
After stripping all of the dash parts…
Greg managed a spot-on match with the paint color…
New door panels and pump covers have also just arrived from SMS.
_________________
~ Tom Sidoti
1959 Buick Electra 225 Convertible
I’ve mentioned the Automatic Heat option several times so I guess a little background on this option is in order.
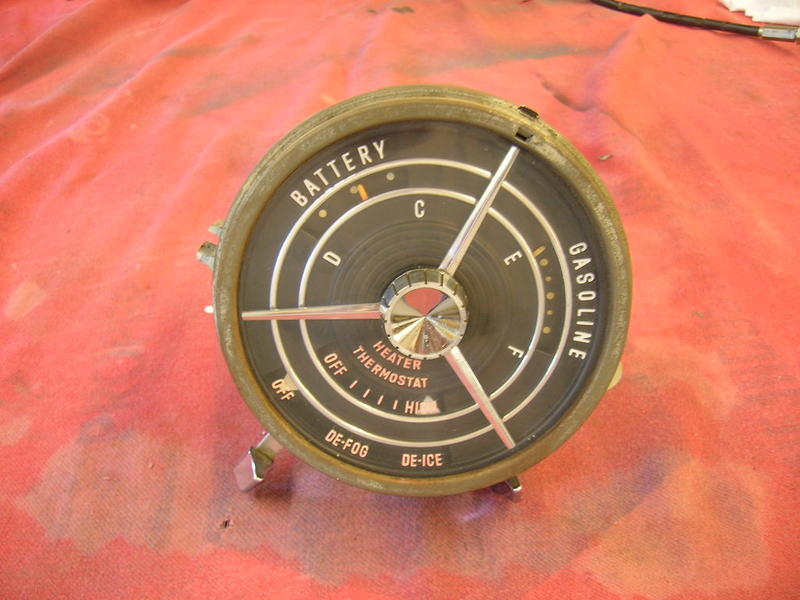
Few people are aware that Buick engineers cleverly designed the world’s first climate control system for their 1959 vehicles. “Automatic Heat” was an extremely rare option that was available on all models and could even be combined with Air Conditioning. This intricate system was not shared with any other GM Division (not even Cadillac) and was a one-year only option. Cars equipped with this unique feature are easily identified by the prominent “Heater Thermostat” wording displayed in a reddish orange color on the right side instrument panel pod (see previous post).
Automatic Heat functioned similar to modern day climate control, only it was accomplished without modern electronics. Because the system was designed to be entirely automatic, cars with this option do not have a manual blower switch. The idea was to set the dash mounted thermostat control lever to a position that provided a comfortable cabin temperature and let the system do the rest. The feature was so sophisticated that it prevented the blower from allowing cold air to enter the cabin.
The system utilized a complex network of electric water and air thermo switches combined with multiple vacuum diaphragms and tubing. The water thermo switch was installed directly into one heater hose in the engine bay and it monitored water temperature. Two air thermo switches were required, one detected inside air temperature and the other outside air temperature.
Upon starting the car the system was automatically energized and the water thermo switch would monitor water temperature until it hit approximately 100 degrees F. If the outside air thermo switch detected a temperature below the operator’s system setting, it would work in tandem with the water thermo switch to complete the circuit and automatically turn the blower on at low speed (this sequence prevented the blower from operating before the heater core was warm thereby preventing cold air from blowing into the cabin). Once the water temperature reached approximately 120 degrees F, the water thermo switch automatically increased blower speed to high. When the interior temperature reached approximately 73 degrees F (or whatever temperature the operator selected), the inside air thermo switch lowered the blower speed back down to low. Unique integration components were added to the system for cars equipped with both the Automatic Heat and Air Conditioning options.
The heating/cooling system was so complex that the 1959 Chassis Service Manual contains six pages of diagrams detailing the multitude of different positions of the four vacuum diaphragms and how they direct airflow based on the dash control settings. One interesting fact is that the 1959 Buick Owners Manual states, “On cars equipped with both air conditioning and heating, both units may be operated simultaneously; the air conditioning providing cool air for upper level while the heating system warms lower level.”
The system was not without its problems, the April 20, 1959 Buick Special Service Information Bulletin discusses an issue concerning the Automatic Heater option. The bulletin references a new Automatic Heater Blower Control package to help refine system operation. The package included a newly designed Ranco heater valve that was much more sensitive, a new thermal switch design, new resistor, and all the necessary wiring. The new kit provided for three automatic blower speeds instead of two. With Low, Medium, and High speeds newly available, the kit allowed for more effective air temperature control and alleviated customer complaints of blower noise and excessive air outlet temperatures. Low and Medium speeds were used above 25 degrees F, and high was engaged below 25 degrees F.
All things considered, Automatic Heat was years ahead of its time and remains one of the most rare and unique options ever installed on a production Buick. When properly maintained the system was known to provide years of trouble free service with reports of some 1959 Buicks still operating with the system performing flawlessly after 50 years…a true testament to Buick engineering!
Below is how the 1959 Buick Automatic Heat option system is described in the actual 1959 Buick Facts Book (Click on Picture to Enlarge).

________________
~ Tom Sidoti
1959 Buick Electra 225 Convertible
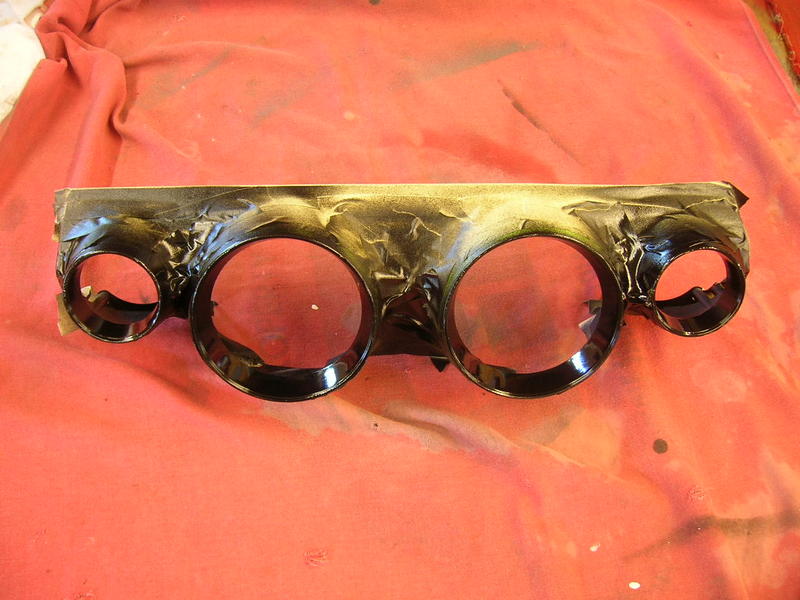
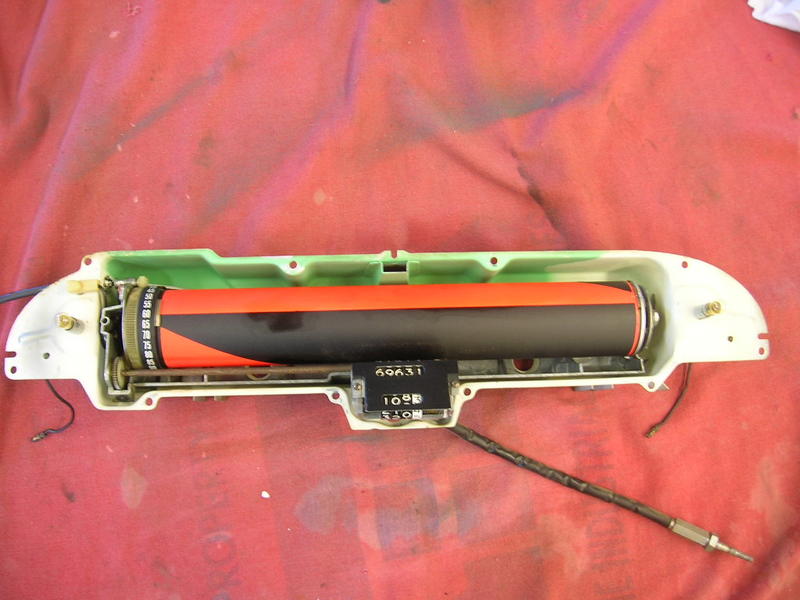
Work is starting on the instrument cluster, looks like a tangled mess just lying there. The little silver box with the six holes in it on the left side of the metal support is one of the air sensors for the automatic heat.


First to clean up the speedometer lens and housing…
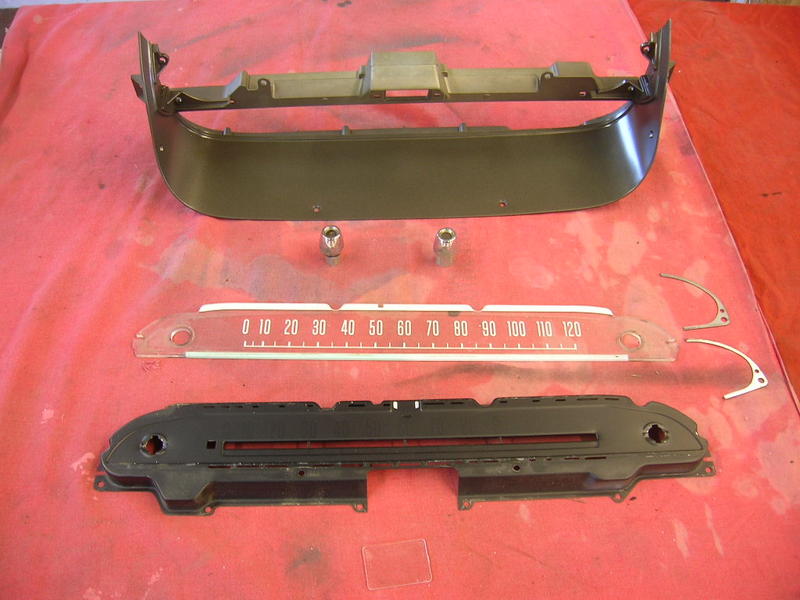
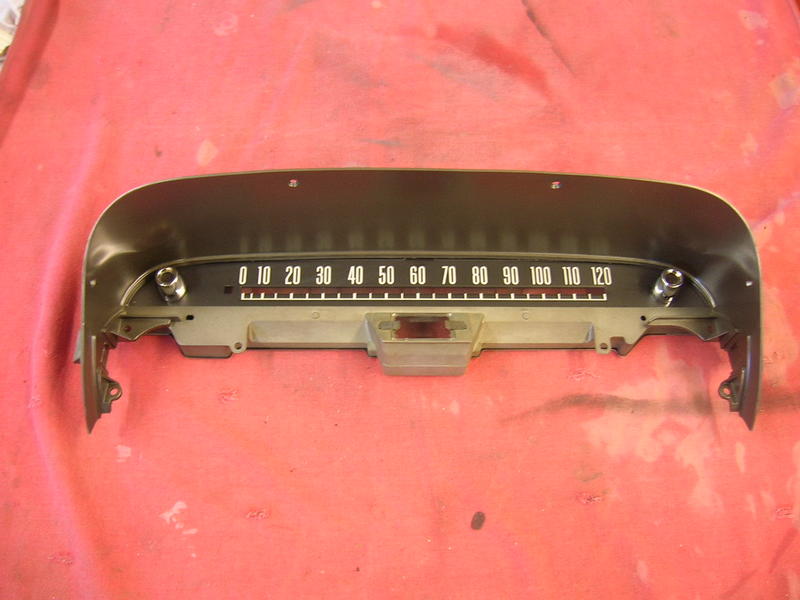
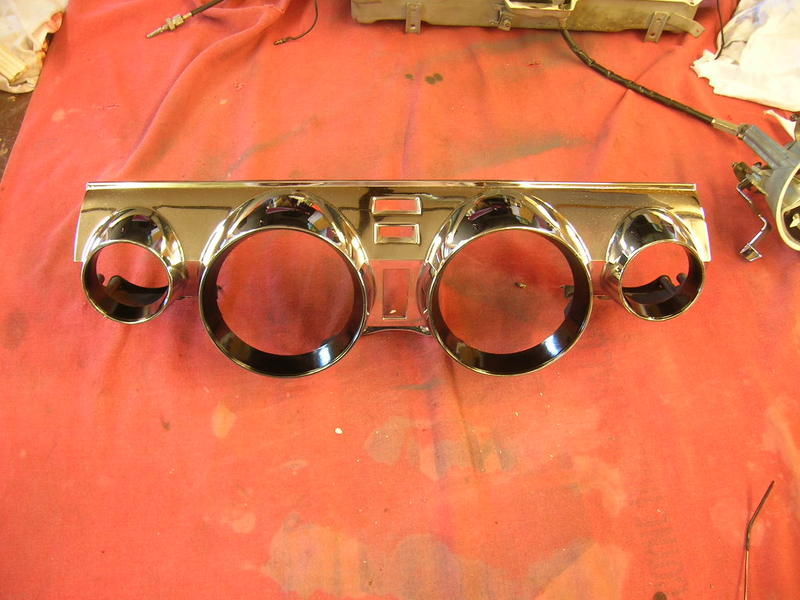
A common problem with the 59 dash cluster is that the black paint on the inside of the gauge bezels cracks and flakes off off over the years. Some people scrape off the paint and leave just the chrome plating which isn’t correct and doesn’t look quite right. In these pictures the dash is being prepared for some fresh black paint for the inside of the gauge bezels….
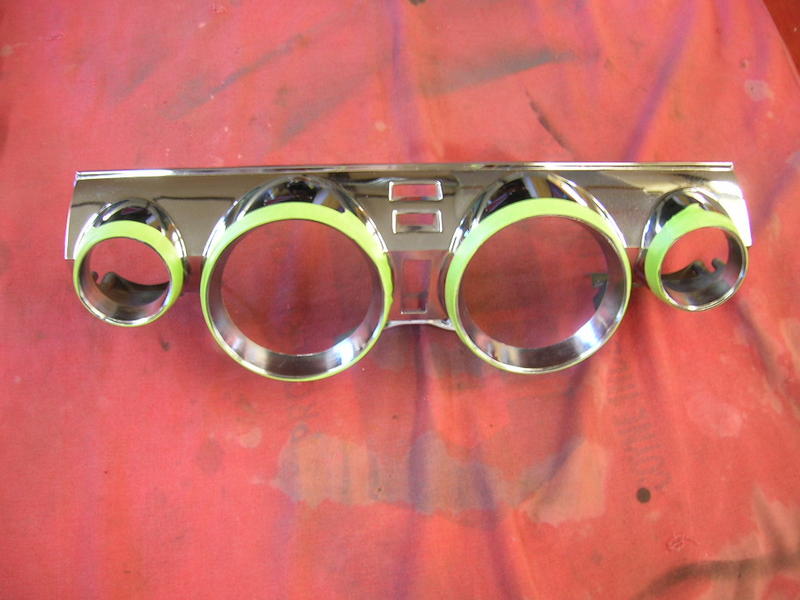
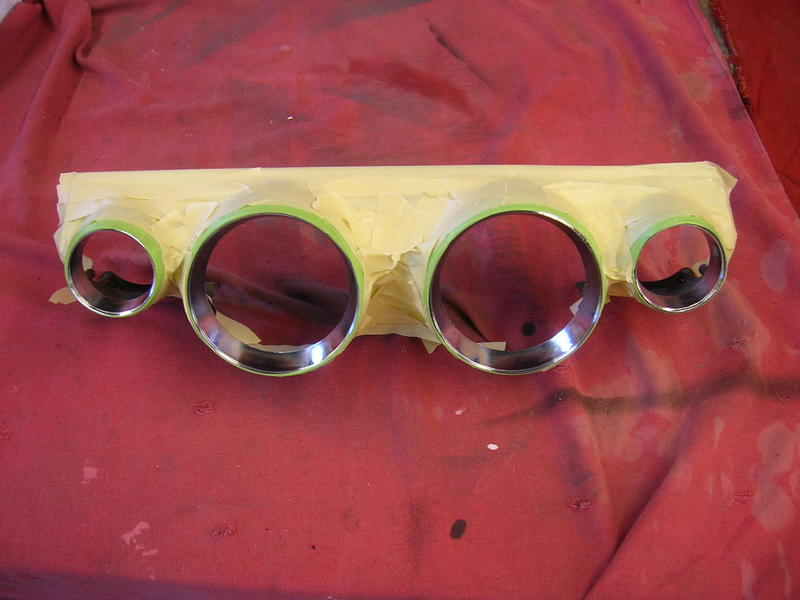
…………………voila’…
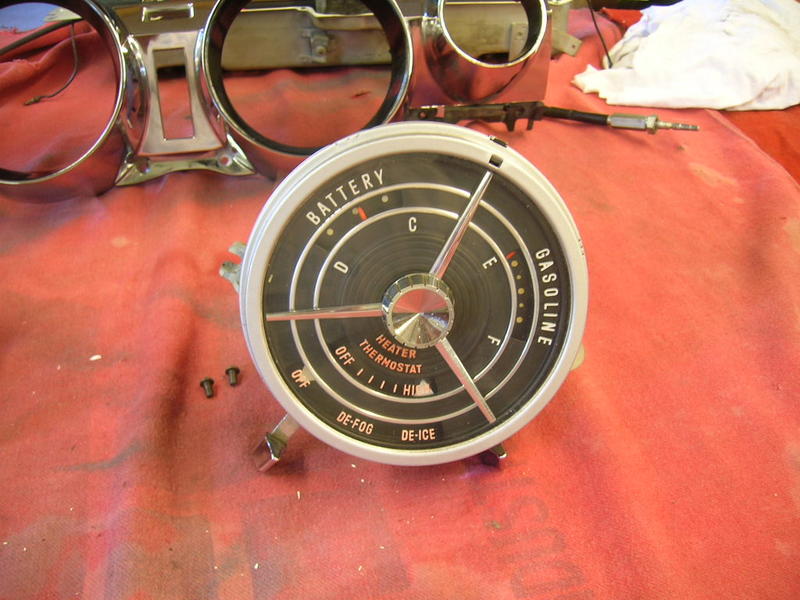
Moving right along to clean 50 years of dust and dirt from the gauges. Notice that we have the replacement temperature gauge.

Here’s an interesting tidbit. All the gauge pointers on a 59 Buick are reddish orange right? Well, not exactly… all the pointers are reddish orange except for the cars with the optional automatic heat. I had thought the pointers on my automatic heat gauge had faded white from the sun and needed to be repainted, but when Greg took it apart he thought something looked fishy. He went out to the parts car (which also has automatic heat) and sure enough those pointer were white also. So for all you Concours judges out there…whereas all the gauges should have white lettering on the lens with reddish orange pointers beneath, the automatic heat gauge should have reddish oange lettering on the lens with white pointers beneath. You learn something new every day.
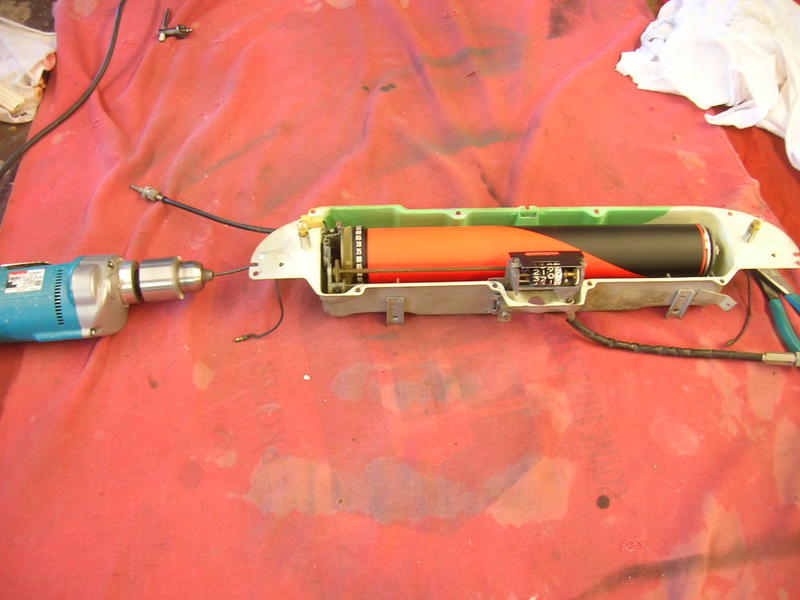
Now to clean and lube the speedometer. For those that have never seen one, a cool feature of the 59 Buick is the speedometer. Speed is indicated by what appears to be a red line that moves across the dash as speed increases. The below pics reveal the secret as to how this is accomplished. A black and red drum behind the dash slowly spins as speed is increased giving the illusion of the red line line.
And finally………..drum roll please……….Looks Positively Dashing…
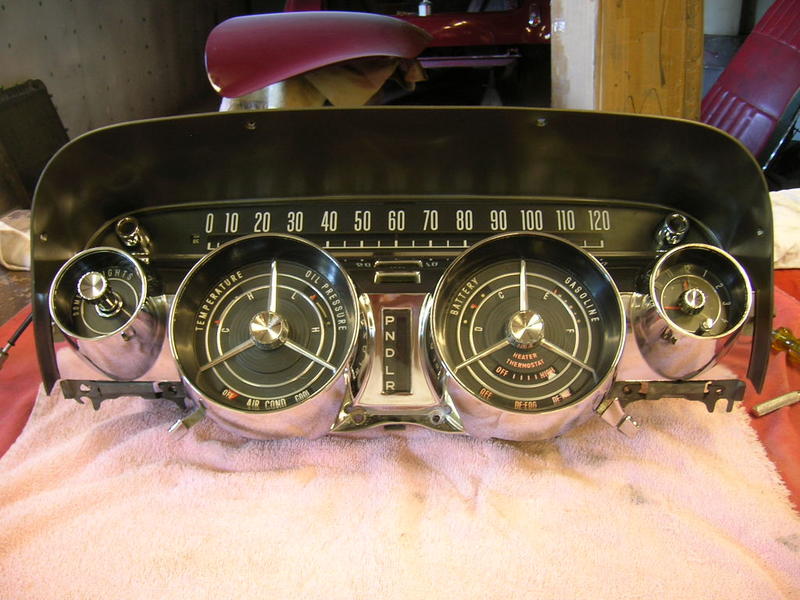
Amazing what a little spit shine can do for a tired old dash!
And now to heave this thing back into the car…

_________________
~ Tom Sidoti
1959 Buick Electra 225 Convertible
Bit of Set-Back…
During the test firings of my car we were using an extra carburetor that Joe had that he will be using on another project. We weren’t using mine because we were waiting on a rebuild kit. Rather than me try to explain the carb issues Greg found, I’ll just use his own words…
“The carb kit arrived today. I started cleaning the main body of the carb. There was a bunch of carbon on the bottom side. By the time I got all that old black carbon dug out this is what was left! Good golly! As you can see it’s just a bit thin around the one bore indicated by screwdriver point. I’m pretty sure that it’s not supposed to be black around the rear bores.


I pulled Joe’s AFB off your engine for comparison. Also, I noticed when I had it running the other day that the choke stat was not pulling heat. I figured the passage was just gunked up. Turns out that the expansion plug under the choke piston is gone!

Below are some comparison shots of my carb (left) versus the temporary one we were using. As we can see, Joe’s carb is just about perfect, and mine’s a mess! The sidewall is eroded out of the one primary bore. The soft plug for the vacuum advance passage is pinholed. Plus just the general erosion in the heat passage.


Greg tells me however that all this is not the end of the world! The stainless steel plate goes right up against the bottom of the carb base. Shouldn’t be a major problem to fill it and smooth it out but the the primary bore sidewall will be a bit tricky.
In the below pic you can see that Greg made some “forms” using aluminum tape on the carburetor. Smeared some steel epoxy on it and let it cure. He’ll then knock it down using the same technique he would use to straighten a quarter panel, back and forth with the long board. When it gets close he’ll switch over the “figure 8” method. Then he’ll attach sticky one side sandpaper to a piece of glass and do “figure 8s” on it with the carb base until it’s nice and flat!

A shot of the base after the steel epoxy was sanded down…the small cavity that was filled in has no effect on carb performance

Now for some black paint to be used as a “guide coat” to make sure it is sanded down perfectly flat,,,

…and here’s the finished carb base ready for installation…not too shabby for something that looked like it was ready for the trash heap…

Since refurbishing the carb base was a success…it’s safe to move forward with the disassembly and rebuild…here’s the “exploded” view…

_______________
~ Tom Sidoti
1959 Buick Electra 225 Convertible